Navigation

  • next
  • previous |
  • Home »
  • 3. Managing Content »

3.6. Previous - Next LinksΒΆ

Automatic previous-next links for content items in a folder can be enabled under the Settings tab for a folder.

The Settings tab is found by clicking the Edit tab for the folder. There is a toggle for enabling previous-next links for items contained in the folder:

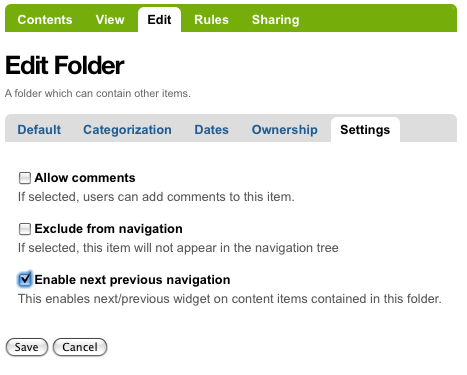
Once enabled, as content items are added to the folder, previous and next links will automatically appear as needed:

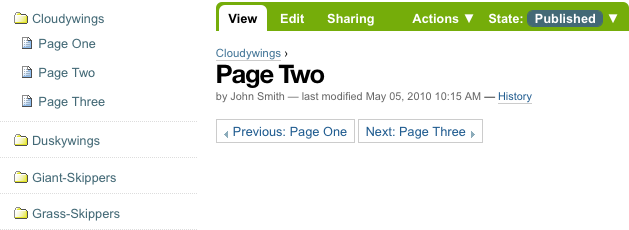
Three pages have been created within the Cloudywings folder, and "Page Two" (which has no text, for this example) has been clicked. At the bottom of "Page Two" are links for "Previous: Page One" and "Next: Page Three."

This is a really useful feature!

Quick search

Enter search terms or a module, class or function name.

Navigation

  • next
  • previous |
  • Home »
  • 3. Managing Content »
© Copyright . Created using Sphinx 1.3.4.

Edit this document

The source code of this file is hosted on GitHub. Everyone can update and fix errors in this document with few clicks - no downloads needed.

  1. Go to 3.6. Previous - Next Links on GitHub.
  2. Press the Fork button. This will create your own personal copy of the documentation.
  3. Edit files using GitHub's text editor in your web browser
  4. Fill in the Commit message text box at the end of the page telling why you did the changes. Press the Propose file change button next to it when done.
  5. Then head to the Send a pull request page (you won't need to fill in any additional text). Just press Send pull request button.
  6. Your changes are now queued for review under project's Pull requests tab on Github.

For basic information about updating this manual and Sphinx format please see Writing and updating the manual guide.